
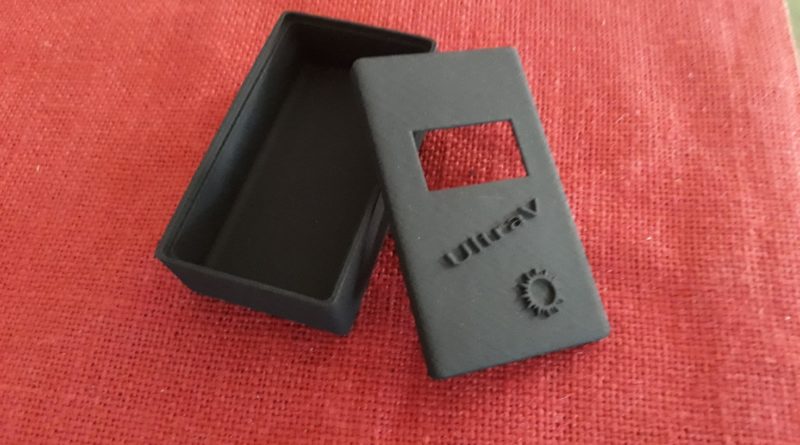
UltraV: a portable UV-index meter
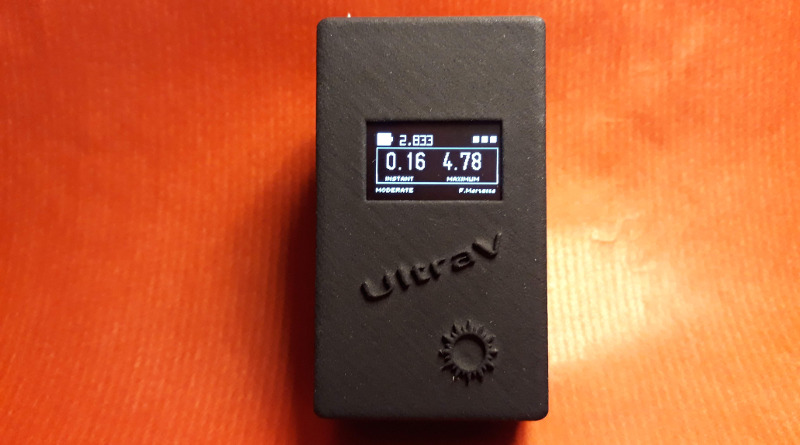
Being unable to expose myself to the sun due to a dermatological problem, I used the time I would have spent on the beach to build an ultraviolet rays meter. UltraV.
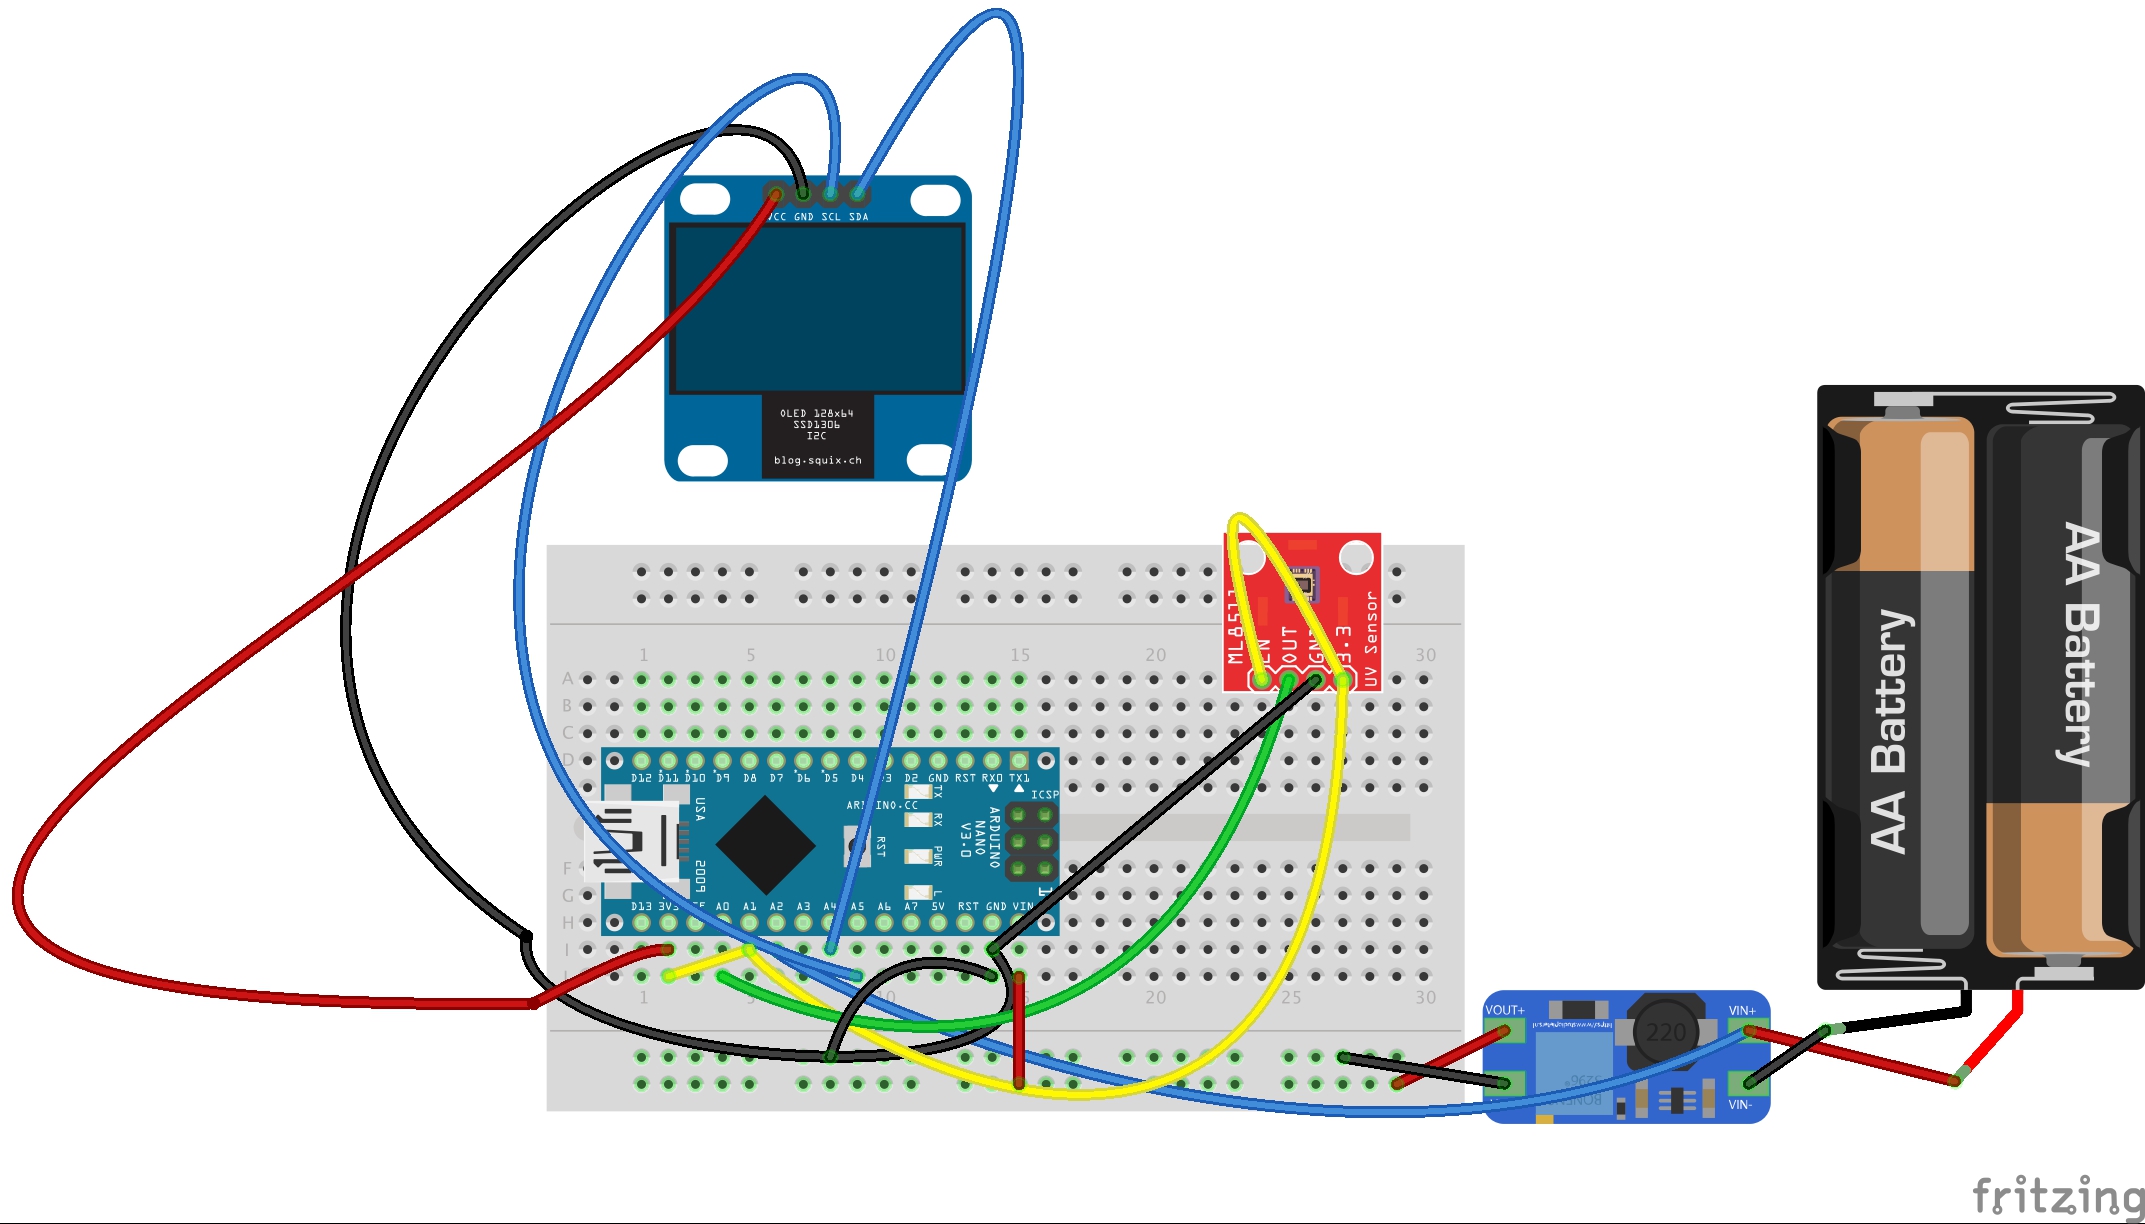
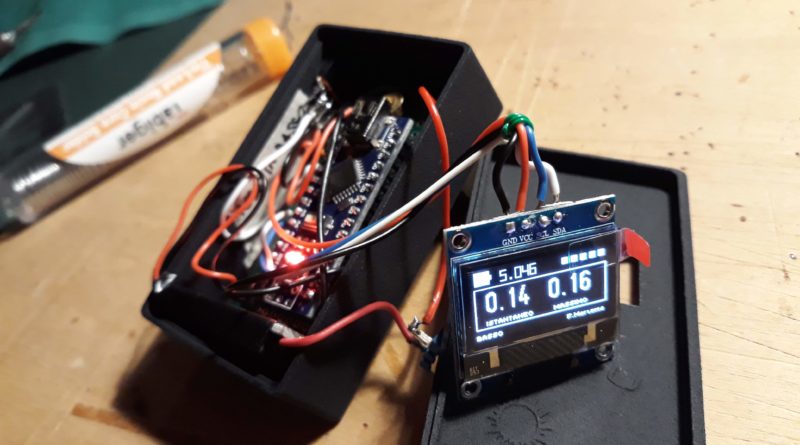
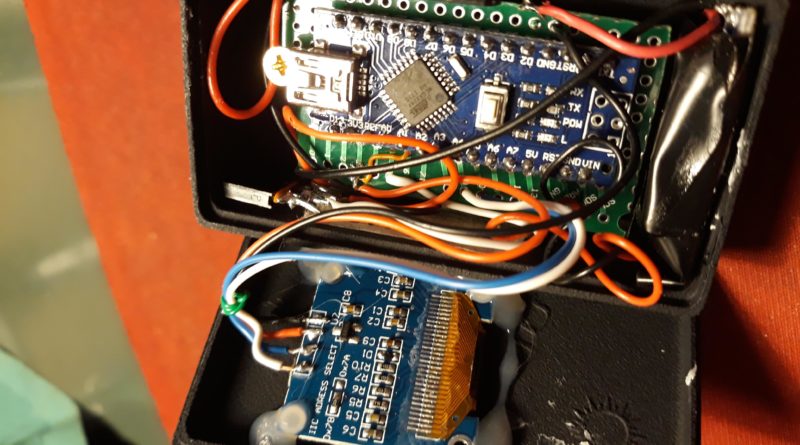
It is built on an Arduino Nano rev3, with an UV sensor, a DC/DC converter to raise the 3v battery voltage, and a small OLED display. My main target was to keep it portable, so that I could easily know the UV-index in any moment and in any place.
Parts and components
- Microcontroller Arduino Nano rev.3
- ML8511 UV sensor
- 128×64 OLED diplay (SSD1306)
- MT3608 DC-DC step-up
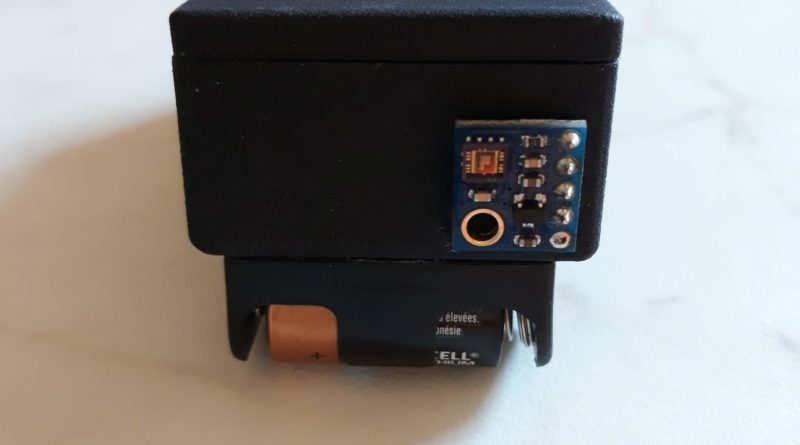
- CR2 battery
- CR2 battery holder
- switch
- enclosure case
The sensor
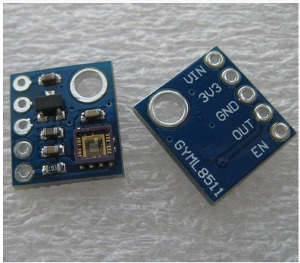
The ML8511 (Lapis Semiconductors) is an UV sensor, which is suitable for acquiring UV intensity indoors or outdoors. The ML8511 is equipped with an internal amplifier, which converts photo-current to voltage depending on the UV intensity. This unique feature offers an easy interface to external circuits such as ADC. In the power down mode, typical standby current is 0.1µA, thus enabling a longer battery life.
Features:
- Photodiode sensitive to UV-A and UV-B
- Embedded operational amplifier
- Analog voltage output
- Low supply current (300µA typ.) and low standby current (0.1µA typ.)
- Small and thin surface mount package (4.0mm x 3.7mm x 0.73mm, 12-pin ceramic QFN)
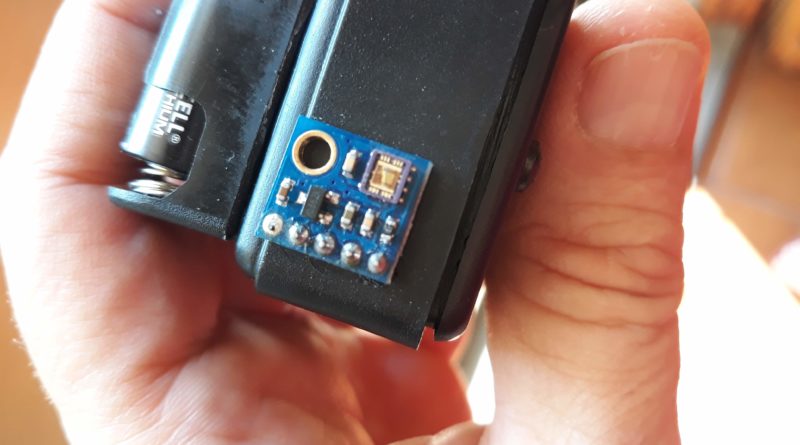
Unfortunately, I didn’t have the chance to find any UV-transparent material to protect the sensor. Any kind of transparent cover I tested (plastic, glass, etc.) was attenuating the UV measurement. The better choice seems to be quartz fused silica glass, but I haven’t find any at a reasonable price, so I decided to leave the sensor outside the box, in open air.
Operations

To take a measure, just switch on the device and point it to the sun for several seconds, keeping it aligned with the direction of the sun rays. Then watch at the display: the index on the left always shows the instant measure (one each 200 ms), while the reading on the right is the maximum reading taken during this session: that’s the one you need. In the lower left part of the display it is reported also the WHO equivalent nomenclature (LOW, MODERATE, HIGH, VERY HIGH, EXTREME) for the measured UV-index.
Battery and voltage reading
voltage = ((long)sum / (long)NUM_SAMPLES * 5023) / 1024.0;
Schematic and Connections
Here it is:
Software
int uvLevel = averageAnalogRead(UVOUT);

    int refLevel = averageAnalogRead(REF_3V3);

float outputVoltage = 3.3 / refLevel * uvLevel;
Enclosure case
After several (bad) tests on manually cutting the rectangular display window on a commercial plastic box, I decided to design my own for it. So, with a CAD application I designed a box and to keep it as small as possible, I mounted the CR2 battery externally on the back side (with a battery holder glued on the box itself).
Download the STL file for the enclosure case, from this link.
Possible future improvements
- Utilize an UV spectrometer to measure actual real-time UV-Index values under various conditions (UV spectrometers are very expensive);
- Simultaneously record output from the ML8511 with the Arduino microcontroller;
- Write algorithm to relate ML8511 output to actual UVI value in real-time under a wide range of atmospheric conditions.
Image Gallery
(Click on images to enlarge)

Credits
- Carlos Orts: https://create.arduino.cc/projecthub/McOrts/mobile-iot-weather-station-with-uv-index-1321c4?ref=search&ref_id=uv&offset=3
- Arduino forum: http://forum.arduino.cc/index.php?topic=3922.0
- Starting Electronics: https://startingelectronics.org/articles/arduino/measuring-voltage-with-arduino/
- U8g2lib: https://github.com/olikraus/u8g2/wiki/u8g2reference
- World Health Organization, UV Index: http://www.who.int/uv/intersunprogramme/activities/uv_index/en/


Grazie anche per questo progetto!